
Wallet Pass iOS Geofencing Guide
Overview
Geofencing lets you trigger actions when a Member enters a defined geographic area, such as a store or restaurant location. In Loyalty, geofencing works with Apple Wallet Passes to surface timely, location-based notifications. When a Member enters a geofenced area, a notification is displayed on the lock screen of their mobile device. If the Member taps this notification, the device displays the Wallet Pass.
Note: Geofencing is currently supported only for Apple Wallet Passes. The Loyalty platform does not yet support geofencing for Google Wallet Passes.
Configuration
Geofencing relies on the relationship between Members, Place Integration IDs, Places, and an Apple Wallet Pass. This section describes how to configure these different components to enable location-based notifications.
Configure Program Setting
The Program Settings CSR Use Email Alias must be disabled (that is, set to False) in your Loyalty instance. For more information see, Program Settings Category - Program.
Define Place Integration ID Attributes
Geofencing requires the use of one or more Place Integration IDs. These IDs are assigned to Places within Loyalty, and are used to uniquely identify different stores, franchises, restaurants, or other locations of interest to the client.
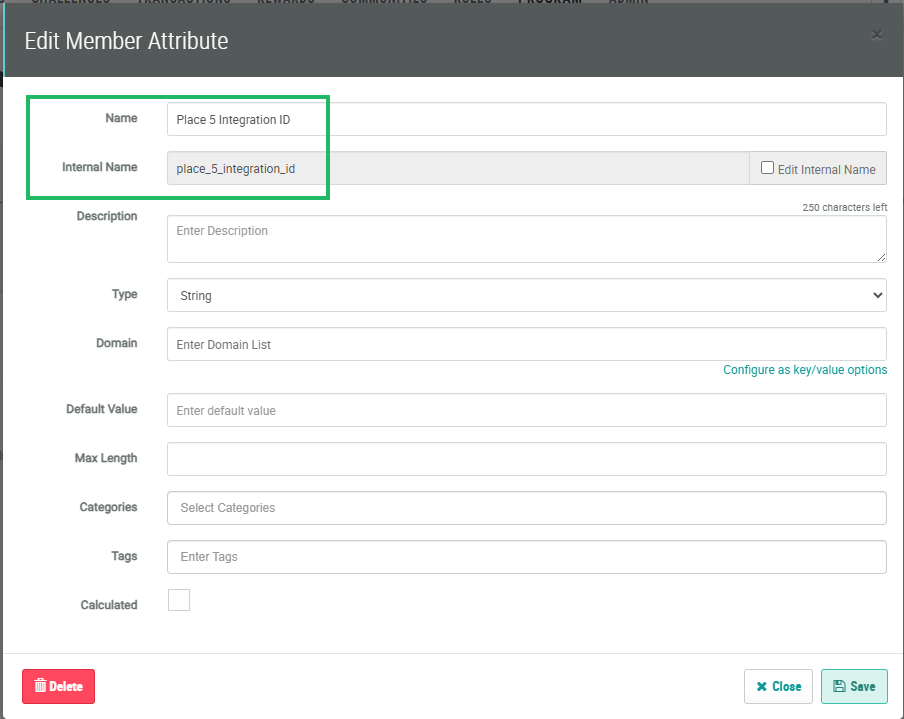
Every Loyalty instance includes one pre-defined Member Attribute (named place_integration_id) used to store a Place Integration ID. Optionally, Apple supports up to nine additional Place Integration IDs for use with geofencing. These additional Place Integration IDs must be stored in Member Attributes that use the following naming convention:
-
place_<x>_integration_id
Within the Attribute name, <x> must be a number between 2 and 10.
For more information on how to create a Member Attribute, see Create a Member Attribute.
Note: When creating additional Place Integration IDs, be sure to start the numbering with 2. Do not use a value of 1 for <x> in the Attribute name. The geofencing feature will not recognize an Attribute named place_1_integration_id.
The Place Integration ID Attributes on a Member Profile can be populated by different means, such as a file import or an API call. For example, if a Member signs up for your loyalty program at a store location, you could automatically populate a Place Integration ID Attribute with the ID value for that location.
As another example, let's say you have an online enrollment form. You could ask each new Member to provide their favorite store location during enrollment. Then within the API call to record the new enrollment, the platform would populate a Place Integration ID Attribute on the new Member's Profile with the ID value of that location.
Or, you could use a Challenge as a way to enrich the Member's Profile by asking them to identify their three favorite store locations. The platform would then populate three Place Integration ID Attributes on the Profile of a Member who completed the Challenge.
Define Places
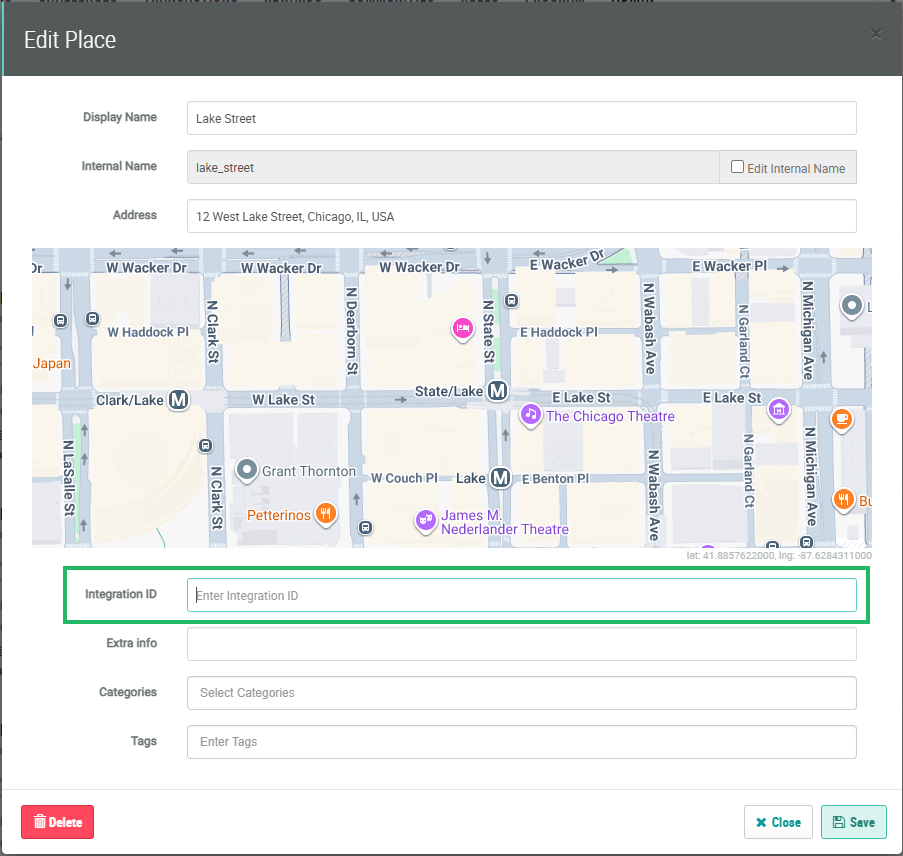
A Place represents a physical location (such as a store or restaurant) that you intend to use for geofencing.
For more information on how to create a Place, see Getting Started with Places.
Note the following when you create a Place:
-
Provide a descriptive label.
-
The platform automatically generates latitude and longitude coordinates for a Place using a Google Maps API call. Validate that these coordinates have correctly been populated.
-
Populate the Integration ID field with the location's store identifier.
-
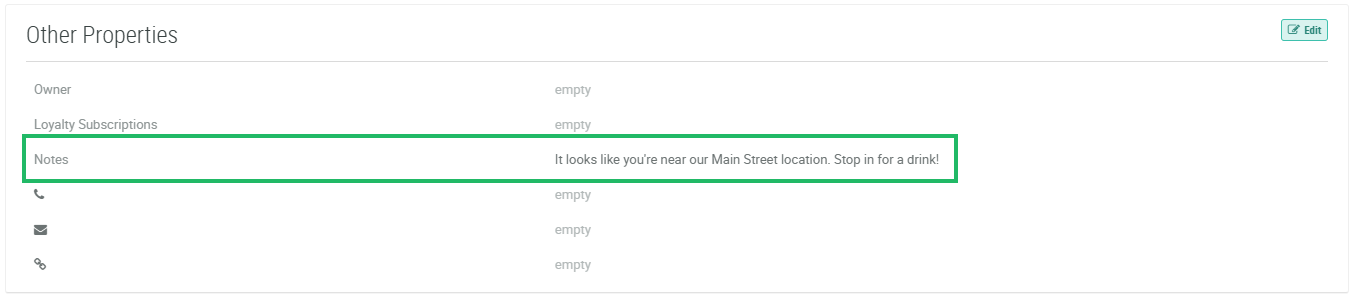
Populate the Notes field in the Other Properties section. The content you provide in this field is the message the Member will see on their mobile device. This static message can be customized to this specific location. For example, "It looks like you're near our Main Street location. Stop in for a drink!"
-
Optionally provide other Place configuration details, such as Dwell Time and Radius. These parameters control if and when a geofencing notification gets sent to a nearby Member. Dwell Time controls how long the Member must remain inside the geofencing perimeter before the platform sends the notification. The Radius determines how close the Member has to get to the location to trigger the notification.
-
The Place must have a status of Published.
Configure the Apple Wallet Pass
Geofencing notifications are delivered to Members through a Apple Wallet Pass. For geofencing notifications to work on a Member's device, the following conditions must be met:
-
The Member has installed your Wallet Pass on their iOS device.
-
Location Services are turned ON at the device level.
-
Apple Wallet has permission to use Location Services, and to send notifications.
This section describes Wallet Pass configuration details specific to geofencing. For general information on how to create an Apple Wallet Pass, see either Create a Store Card / Loyalty Pass or Create a Coupon / Offer.
The Wallet Pass can be used to display general store location information in the Back Content of the Pass. To configure this section:
-
On the Wallet Pass Details screen, select the Apple tab, then select the Back Content section.
-
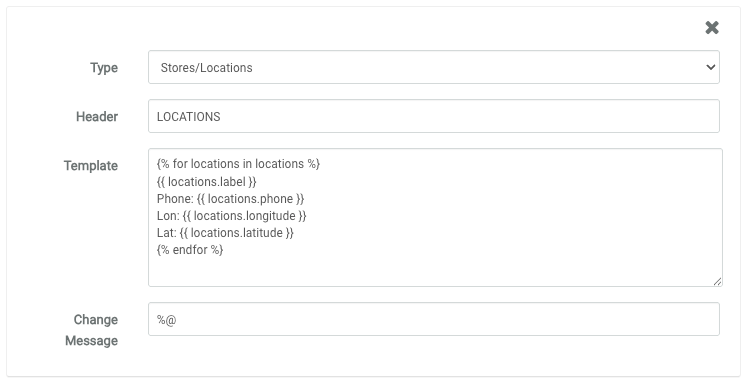
Create a new section with a Type of Stores / Locations.
-
In the Template field, enter the following example Liquid code (or modify this example code as needed to meet your requirements):
{% for locations in locations %}
{{ locations.label }}
Phone: {{ locations.phone }}
Lon: {{ locations.longitude }}
Lat: {{ locations.latitude }}
{% endfor %}-
Save and publish the Wallet Pass.
Note: As described above, the actual content of the notification that appears on a Member's device when they approach a geofenced location is not defined as part of the Wallet Pass. Instead, the notification content is defined as part of the Place, within the Notes field.
Test Geofencing
After configuring the Loyalty platform features described above, the best practice recommendation is to test your geofencing setup.
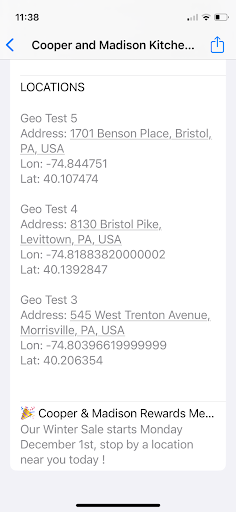
Verify Location Information on the Wallet Pass
To test that store location information is displayed properly in the Back Content of your Apple Wallet Pass:
-
Iinstall or update the Wallet Pass on a test mobile device.
-
Open the Pass in Apple Wallet, and tap the "..." icon to view the Back Content.
-
Locate the Stores / Location section, and confirm it shows the expected details as configured in the Liquid Template for the Pass. For example:
Test a Location
First, you must associate a Member to a Place by populating one or more of the Place Integration IDs on that Member's Profile. This association determines which locations (up to ten) can be used for geofencing for that Member.
For testing purposes, you can manually populate one or more Place Integration IDs for a Test Member on the Member Details screen (see Member Details - Profile for more information), or on the Member Profile screen (see Edit Member Attributes for more information).
It can be useful to create "test" Places with locations that are simple for you to physically access for testing purposes, such as your home or office. Note that if you use your home or office as the test Place, the notification will display on your lock screen until you exit that location. Even if you tap the notification and access the Wallet Pass, the device recognizes that you are still inside the geofence, and will continue to display the notification until you leave.
If your test iOS device is already inside the geofence, use the following steps to simulate geofencing, and to verify that notifications are delivered to your iOS device.
-
Ensure the Test Member's Place Integration ID Attribute is populated.
-
Turn Location Services OFF at the device level.
-
Install the Wallet Pass on the iOS device.
-
Turn Location Services back ON for the device, and confirm that Apple Wallet has permission to use Location Services. Toggling Location Services forces iOS to recalculate the device's location and will trigger a Wallet Pass notification on the lock screen (in real-world use, a Member would trigger the notification by physically approaching the location). The content of the notification will be the Note assigned to this Place.
If your test iOS device is not already inside the geofence, use the following steps to verify that notifications are delivered:
-
Ensure the Test Member's Place Integration ID Attribute is populated.
-
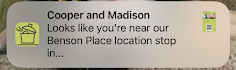
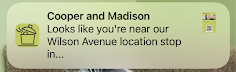
Move the test device inside the geofence radius. When the device enters the geofence radius, look for a Wallet Pass notification on the lock screen. The content of the notification will be the Note assigned to this Place.
If you have multiple Places defined, you can test them as well. Make sure that you have multiple Place Integration ID Member Attributes defined, and that these Attributes are correctly populated on the Test Member’s Profile. Then simply move the device to the location of a different Place. When the device enters the new geofence radius, look for a new Wallet notification on the lock screen. The content of the notification will be the Note assigned to this Place.
Troubleshooting
This section provides troubleshooting suggestions for the geofencing feature.
Back Content Shows no Locations
If the Back Content of the Wallet Pass is not correctly showing the list of locations, check the following:
-
Confirm the Back Content section type is Stores / Locations.
-
Verify the Liquid template uses the locations' collection (for example, {% for locations in locations %}).
-
Check that the Test Member’s Place Integration ID Attribute is not empty, and that the value exactly matches a Place Integration ID assigned to a Place.
-
Save the Wallet Pass after making any configuration changes.
No Wallet Notification Received
If you don't receive a Wallet Pass notification after moving the test device inside the geofence perimeter, check the following:
-
Confirm that the CSR Use Email Alias Program Setting is set to False.
-
Ensure Location Services are enabled on the device, and that Apple Wallet has permission to use Location Services.
-
Confirm notifications are allowed for Apple Wallet and for this specific Wallet Pass.
-
Verify that the device has actually entered the geofence radius (try moving away from the location and returning).
-
Verify the Place’s coordinates and any configured Radius settings.
-
Confirm that the desired notification message has been entered into the Notes field for the Place.
-
Confirm that Back Content shows the correct location for the Member. If it is blank or incorrect, update the Place Integration ID on the Member's Profile, and refresh the Wallet Pass.
